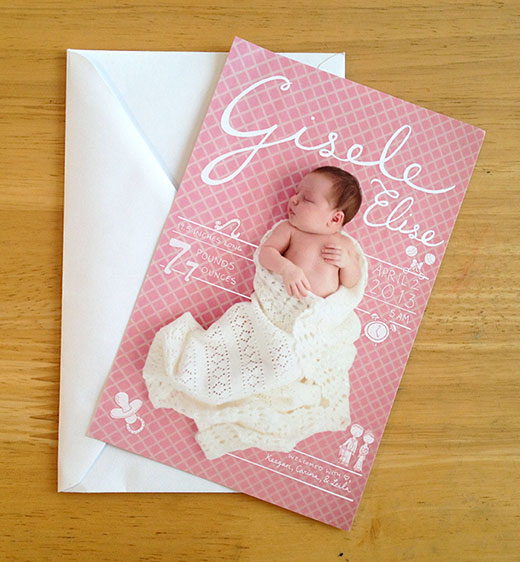
Yay, I can finally show you one of the client projects I’ve been working on recently! They’ve been printed up and mailed out, so now they’re free to talk about! I designed this birth announcement card for a couple here in Texas to announce the arrival of their new baby girl, Gisele Elise. They asked me to create a unique design around a photo they gave me from a shoot they had with a local photographer, and I was thrilled with the image! The colors, the blanket, the position of the baby—it was a perfect start for the design! We all wanted the design to be very unique and feminine, but still clean and modern. As you know, I love to document my process, so here are some of the steps I went through to create this design:
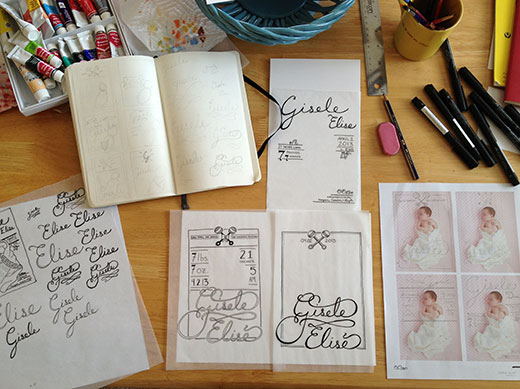
Step 1: Sketching and Ideating
We knew we wanted hand-drawn typography to be a major focus of the design (besides Gisele, of course), so I began the process by sketching and playing around with the lettering of “Gisele Elise”. From there, I moved on to sketching very rudimentary layouts in my sketchbook, figuring out how the elements could be arranged. I then sketched my favorite layouts in pencil on top of the photograph to see how the type and layout would interact with the image. I refined a few of those sketches by redrawing them at the correct scale and inked those sketches. All of this can be seen in the above image.
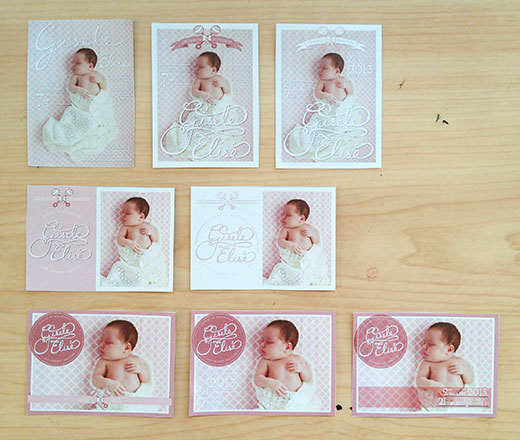
Step 3: Finalizing Concepts and Presenting Concepts to Client
I then scanned in the inked sketches and began manipulating them digitally and introduced the photograph to the design. I played around with the elements, colors, and layout until I got everything just right. This step usually ends with many different versions, forcing me to narrow down and eliminate a few before presenting to the client. I try not to show more than 3 versions of a design to a client because if you show too many, the choices are just too overwhelming and they begin to mush together. Kind of like how I feel when I go to the store, Forever 21: it looks like there’s a lot of good stuff here, but holy moly are there really 10 rooms!? In this case, I presented 4 of the above concepts to the client.
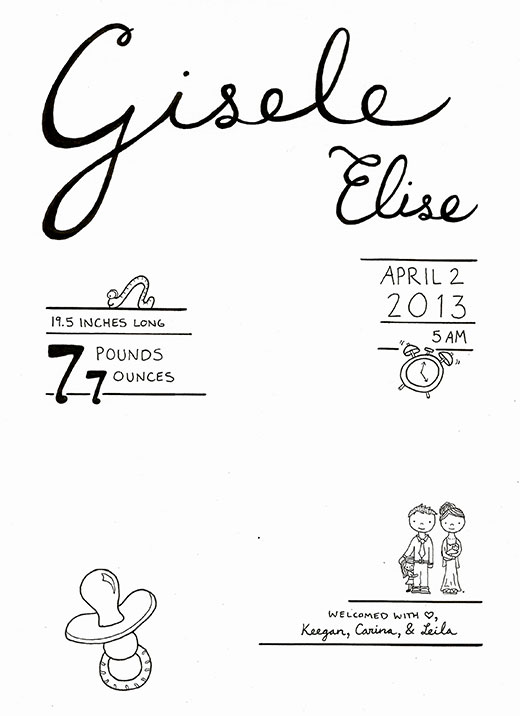
Step 3: Refining Chosen Concept, Redrawing Elements
After I talked with the client about their chosen concept and feedback/suggestions, I refined the layout and illustrations, added a few extra elements, and re-drew all the final elements.
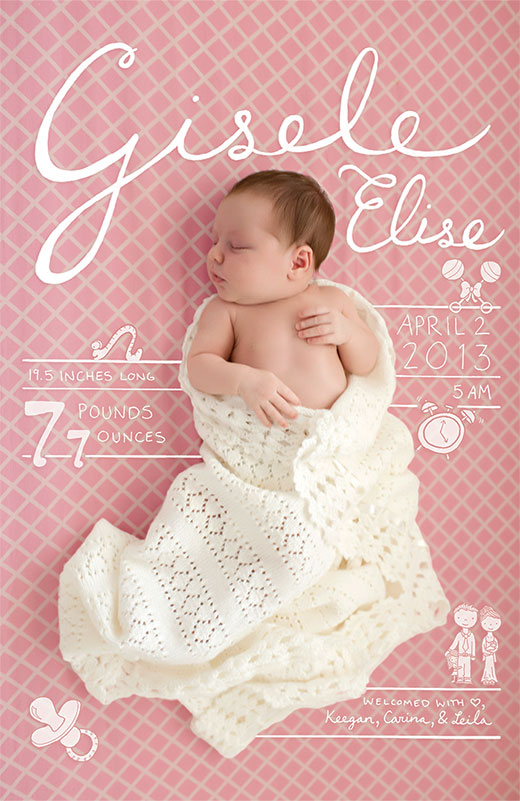
Step 4: Finalizing and Bringing to Life!
After that, its all just digital manipulation and minute pixel-pushing! Now’s the time where it can get obsessive, making sure everything is perfectly aligned, straight, colored, and crisp. Once the design was finalized I sent it to the client for another look, got the approval, created the print-ready files, and sent them off to be brought to life!
I’m really happy with how it turned out, and love being able to hold the printed piece in my hands! There’s just something about being able to hold your work that is so satisfying. You can see a few more shots of the piece in my portfolio, and if you have an announcement or special occasion coming up that you’d like to possibly collaborate on a designed piece for, let me know!
